


These are instructions on how to root the Xolo Q800 smartphone (running on android 4.1.2) using Motochopper Tool on Windows Computer.
Caution: Rooting the device using any rootkit may brick the device. Therefore, we recommend you take a backup of your data before following the method below.
Root Xolo Q800
- Download and extract Xolo Q800 USB driver on the computer. If in case Xolo USB drivers are already installed on the computer, then SKIP this step.
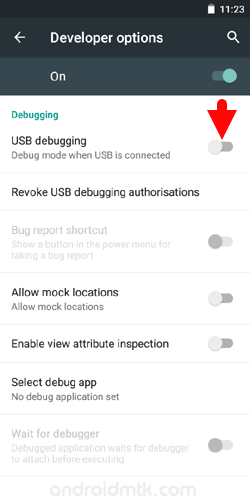
- Enable USB Debugging mode on your Xolo Q800 smartphone. To Enable USB Debugging Settings > Development > USB Debugging (Tick to enable it).
- Connect your Smartphone to the computer using the USB Cable.
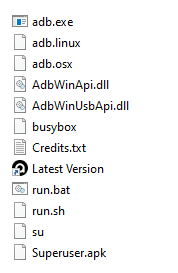
- Download and Extract Motochopper Tool on your Windows Computer. After Extracting you will be able to see the following files:
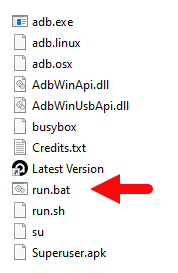
- Now, Open run.bat (you have extracted this file in step#4).
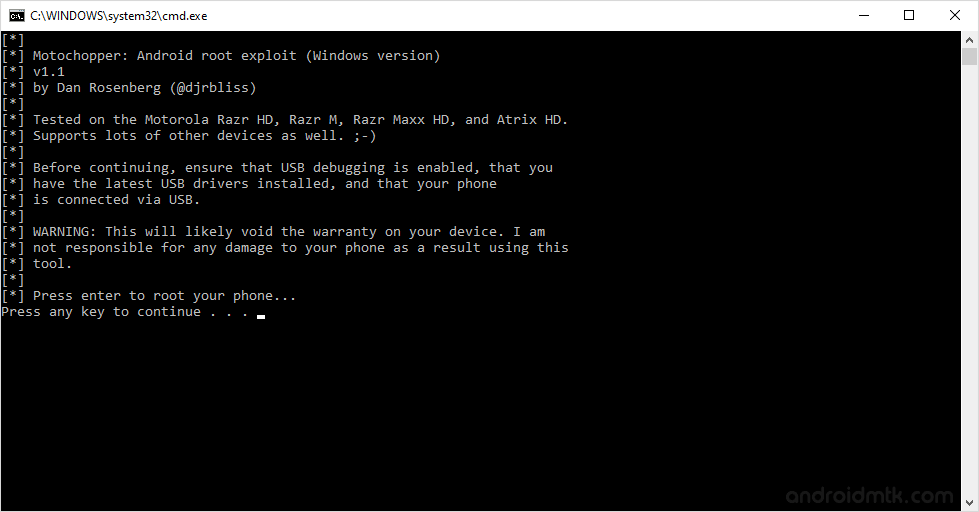
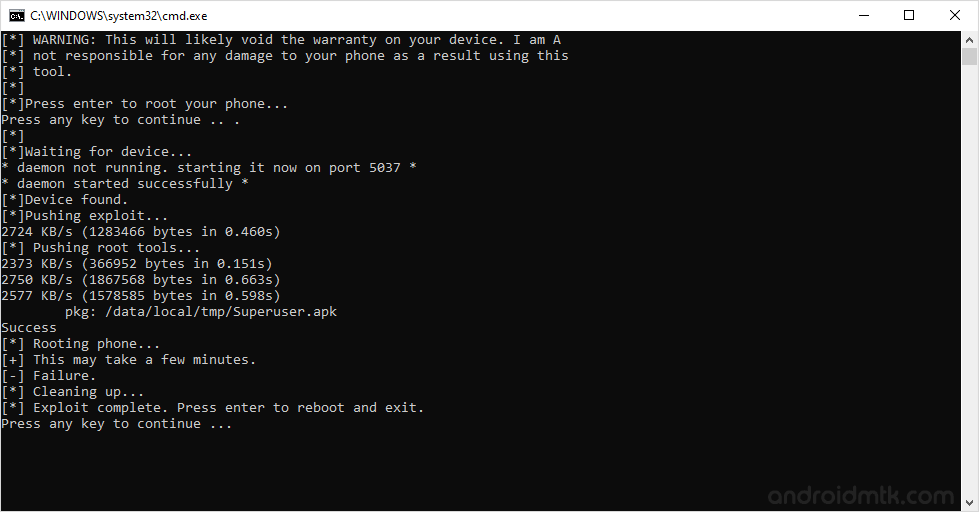
- Once the Run.bat file is launched you will be able to see the following screen. Now, to begin the rooting process Press any Key from the keyboard.
- Once the rooting process is completed you will be able to see the following screen with a success message. Now, again Press any Key from the keyboard. This will exit the run.bat file and your Xolo Q800 smartphone will restart automatically.
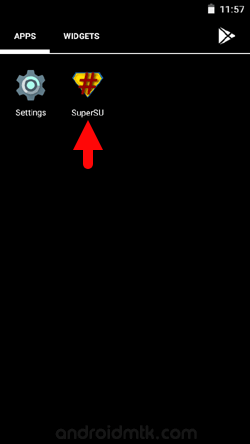
- Now your Xolo Q800 is successfully rooted. To verify this, Open the Applications Menu On your Smartphone and search for the SuperSU app installed.

(Developer Options are hidden for Android 4.2.2 and above. Go to Settings > About Phone > Built Number > Tap on it 5-8 times to display this option).

Optional You can also verify the root status of your device by using the Root Checker App.
Notes
No data loss process: Your Phone Data like contacts, pictures, videos, music and etc will be not affected with the above method.
Warranty Void Your Xolo Q800 phone Warranty may be Void after following the above tutorial.
How to Unroot? To unroot, Open SuperSU > Settings > Full Unroot.
Xolo Stock Firmware If you are looking for the Original Stock Firmware then head over to the Download Xolo Stock Firmware page.
Xolo USB Driver: If you are looking for the Original USB Driver, then head over to the Download Xolo USB Driver page.
Credits: The Motochopper Tool was created and distributed by Dan Rosenberg (XDA Developer). So, full credit goes to him for sharing the toolkit for free.

