In this article, we will teach you how to install .img firmware on RockChip devices using the RockChip Android Tool.
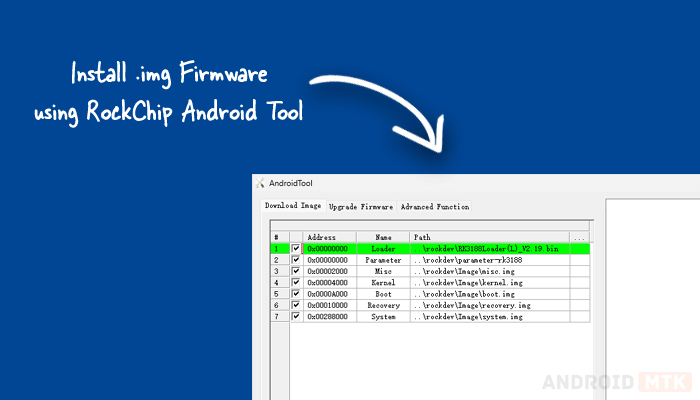
What is RockChip Android Tool?
RockChip Android Tool is a Windows utility for Rockchip-powered Android devices. It lets you flash or install firmware, update the boot image, and even unpack the firmware itself. With caution, you can even make customizations or back up your device before making changes.
What is RockChip Firmware?
Rockchip Android Firmware is software specifically designed for devices with Rockchip processors. This firmware provides the core Android system functionality, including booting up, running apps, and managing hardware components like WiFi and Bluetooth
How to install .img firmware using RockChip Android Tool
Before installing/flashing .img firmware using the RockChip Android Tool, please make sure to install the necessary drivers and tools.
Prerequisites
- Charge your device to at least 40-50% (if chargable).
- You will need a working Windows PC/Laptop and a USB cable.
- Take a complete Backup of your Device (if possible).
- Download and install RockChip Driver.
- Download and extract RockChip Android Tool.
- Stock Firmware (.img) of the device.
Disclaimer androidmtk.com will not be held responsible for any device damage resulting while/after following this guide. Proceed with caution!
Steps to install .img Firmware using RockChip Android Tool
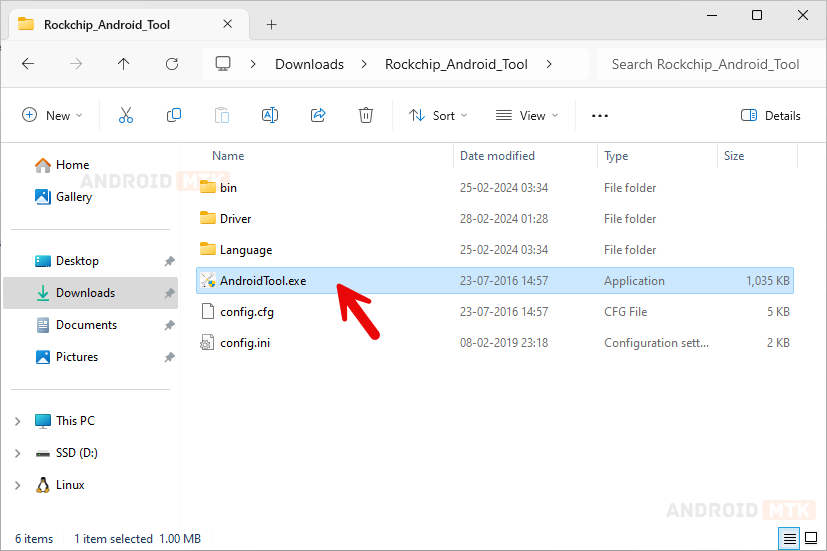
- To proceed, you need to find the RockChip Android Tool folder and then open the file called “AndroidTool.exe”.
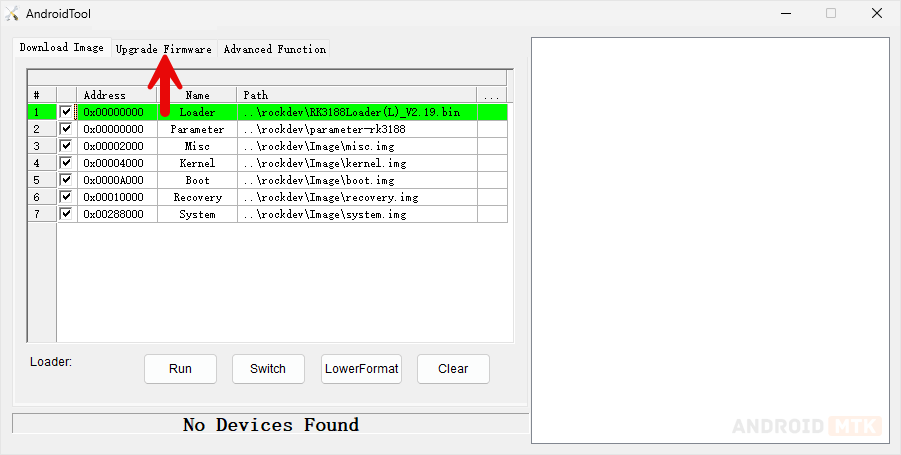
- Once the Tool is launched, Click on “Upgrade Firmware” Tab.
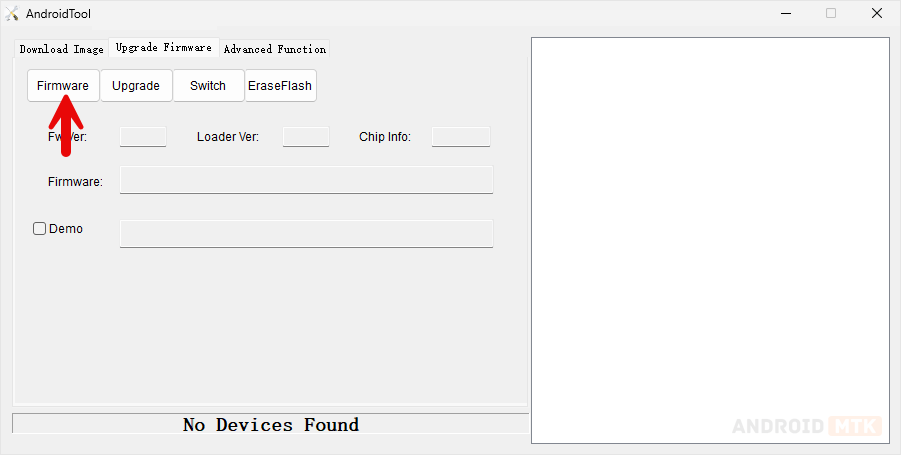
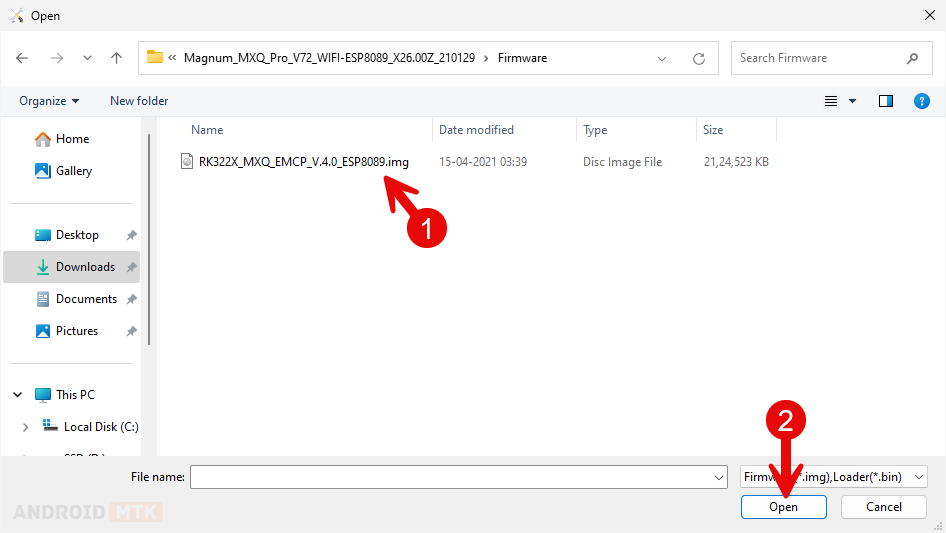
- Click on the “Firmware” button under the “Upgrade Firmware” tab and load the firmware from your computer.
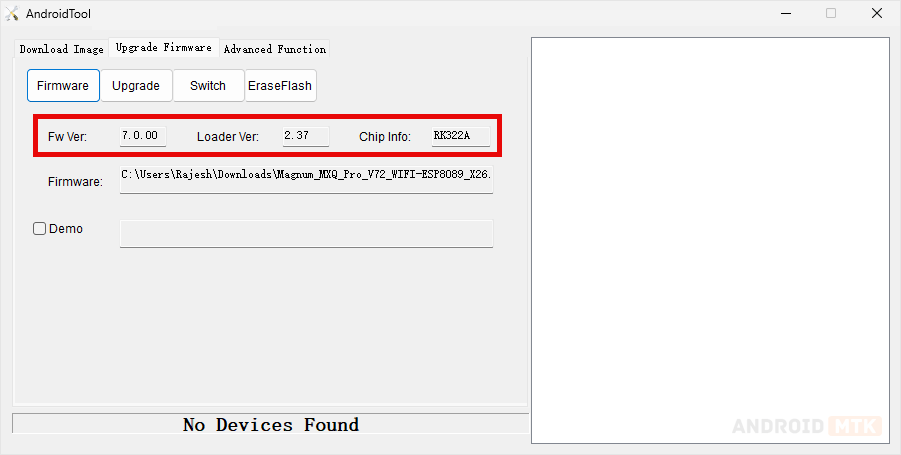
- After loading the firmware in the Flash Tool, the firmware details will be displayed.
- Connect your RockChip device to your computer using a Male-to-Male USB cable. First, connect the USB cable to your computer and then connect it to your Android TV Box using the OTG port. After that, insert a pin or cable into the recovery port and plug the power supply at the same time. This will generate a sound on your computer and enable the RockChip Android Tool to detect your device.
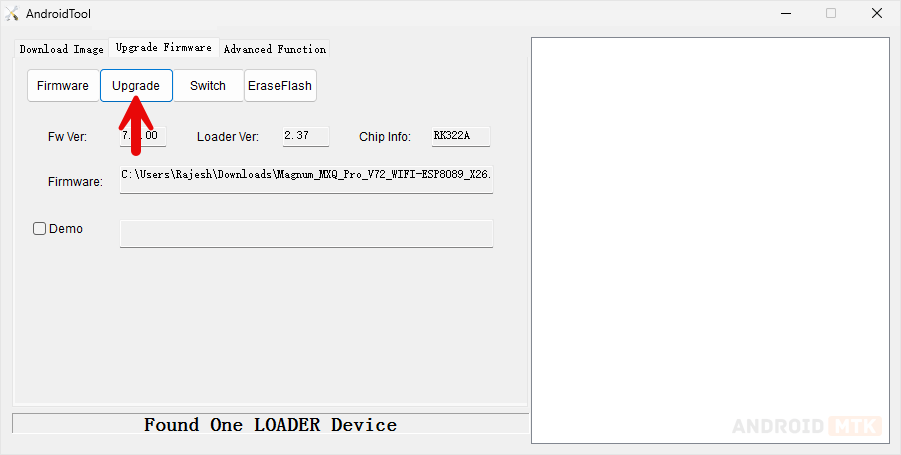
- After the device is detected by the RockChip Android Tool, unplug the Pin or cable from the recovery port. However, make sure that the power supply is connected.
- Click on the “Upgrade” button to begin the flashing process.
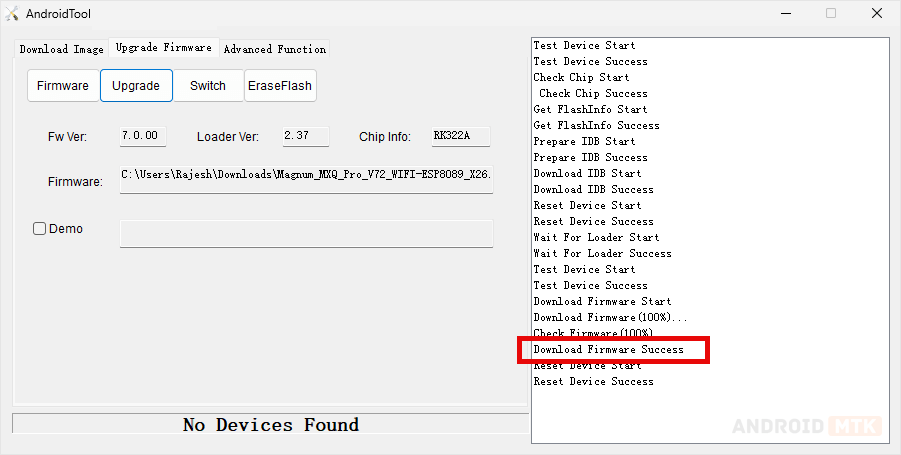
- After the flashing process is finished, you will see a message that says “Download Firmware Success”.
- Please make sure to close the Flash Tool and disconnect the USB cable from the RockChip Device. Your device will initiate a process [1] after flashing, which may take several minutes to complete.

Congratulations! Your RockChip device has been successfully updated with the latest firmware, which includes bug fixes, performance enhancements, and new features.
Notes
- Initial Process: Your device will complete the initial boot after flashing, which can take a few minutes. Once done, you’ll need to provide your Wi-Fi and other details, just as with a new device.
- Caution: It is recommended to back up your data before flashing or installing firmware using the RockChip Android Tool, as it erases all device data.
- RockChip Driver: If you are looking for the RockChip Driver compatible with the RockChip Android Tool, then head over to RockChip Driver page.
- Credits: RockChip Android Tool is created by Fuzhou Rockchip Inc (developer). So, full credit goes to them for sharing the tool for free.