These are instructions on how to manually install the Google ADB Driver on Windows Computer (including Windows XP, Vista, Windows 7, Windows 8, 8.1, and Windows 10).
Manually install Google ADB Driver
- Download and extract Google ADB Driver on your Windows Computer.
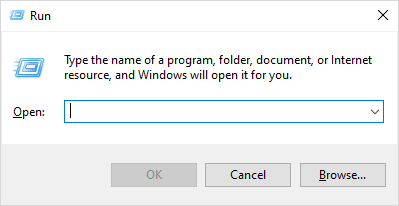
- Now, On using your Computer Keyboard Press Win + R key to launch Run Command.
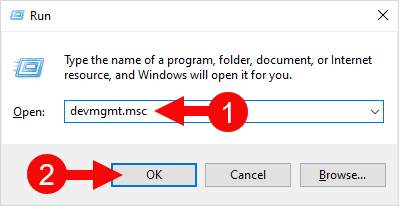
- Once, the run command is launched, Type devmgmt.msc and Click on OK Button to launch Device Manager.
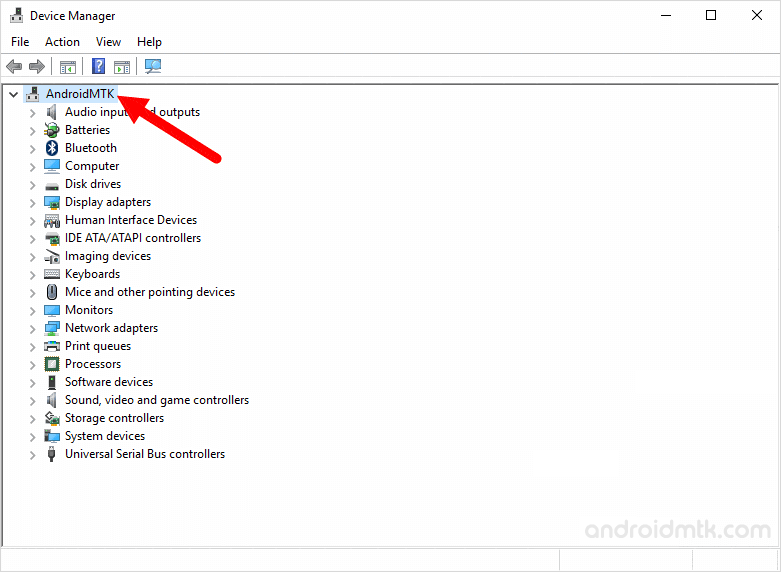
- Once, Device Manager is Launched, Click on your Computer Name.
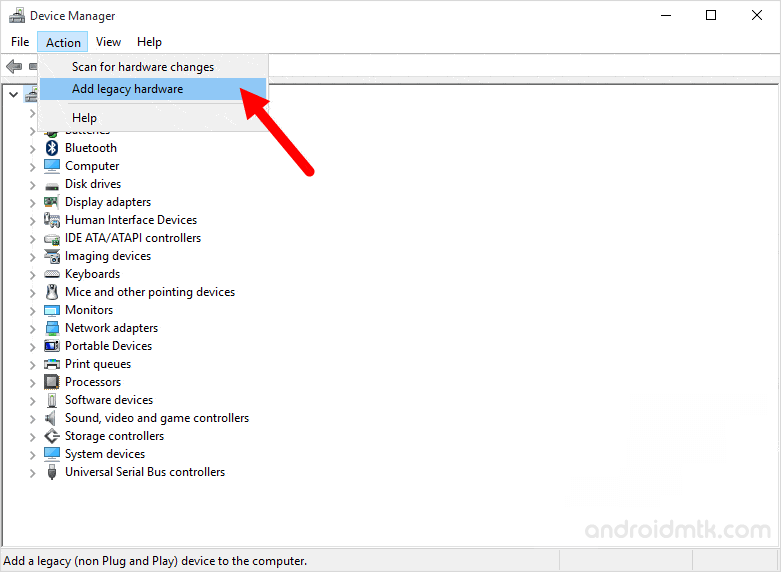
- Now, Click on Action Menu and Select Add Legacy Hardware.
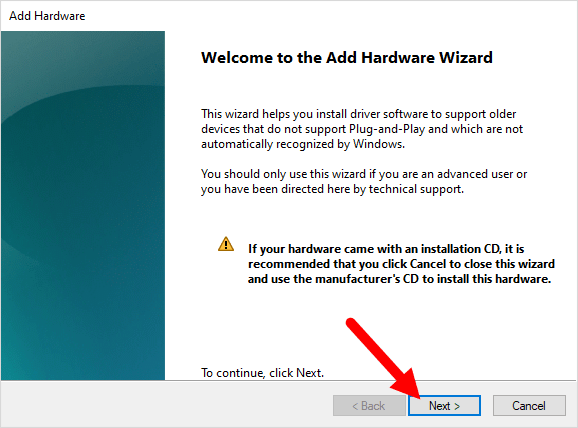
- In the Add Hardware Wizard > Click on Next to Continue.
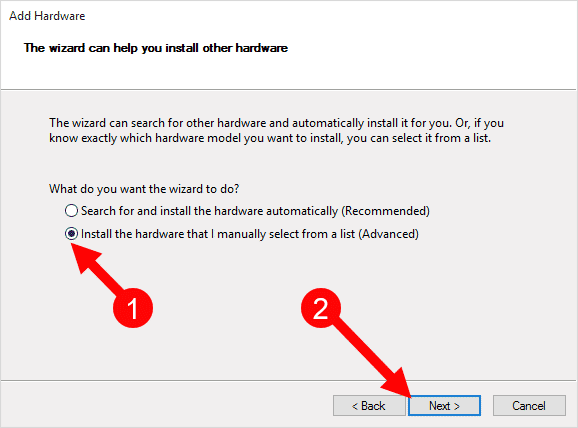
- Now, Select Install the hardware that I manually select from a list (Advanced) and click on Next to Continue.
- Now, under Common hardware types > select on show all devices and click Next to continue.
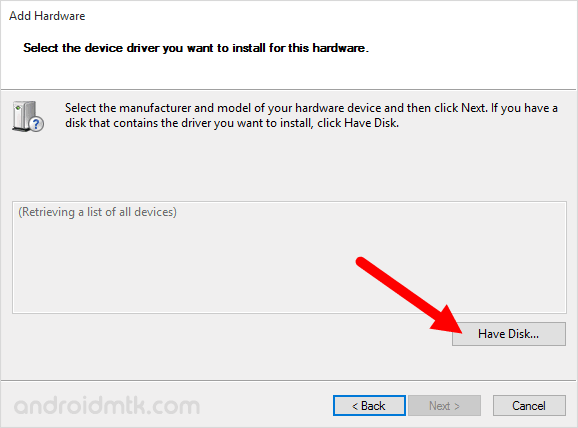
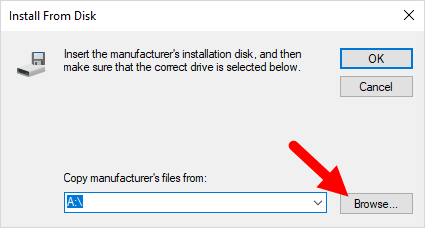
- Now, click on Have Disk and using the browse button locate the extracted Google ADB Driver (android_winusb.inf) that you have downloaded in Step#1.
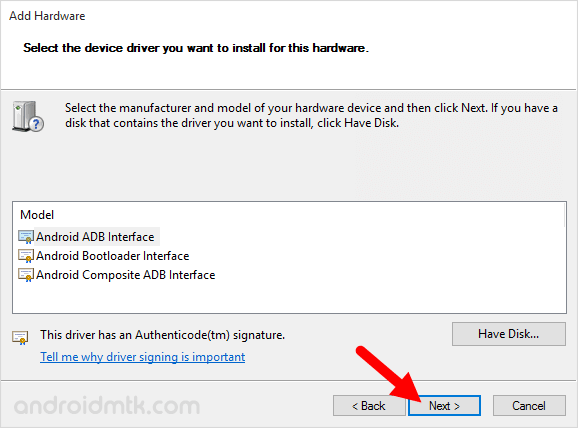
- Once, your driver is listed in the blank area, click on Next to continue.
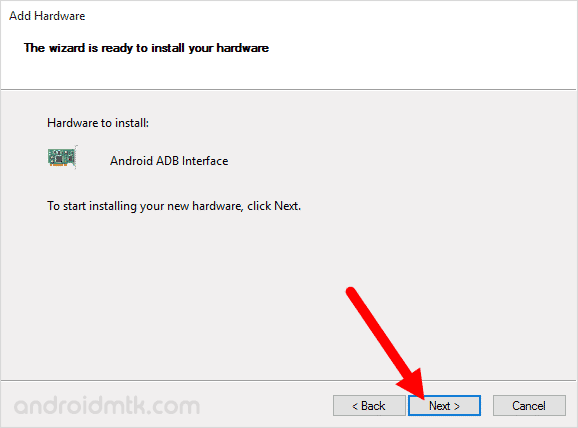
- Now, again Click on Next to continue.
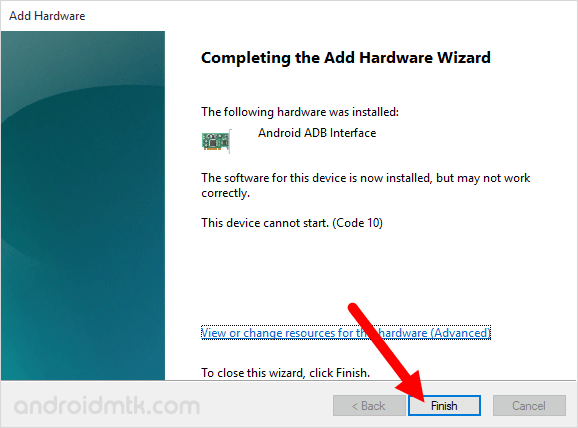
- Lastly, Click to finish the button to close the Add Hardware Wizard.



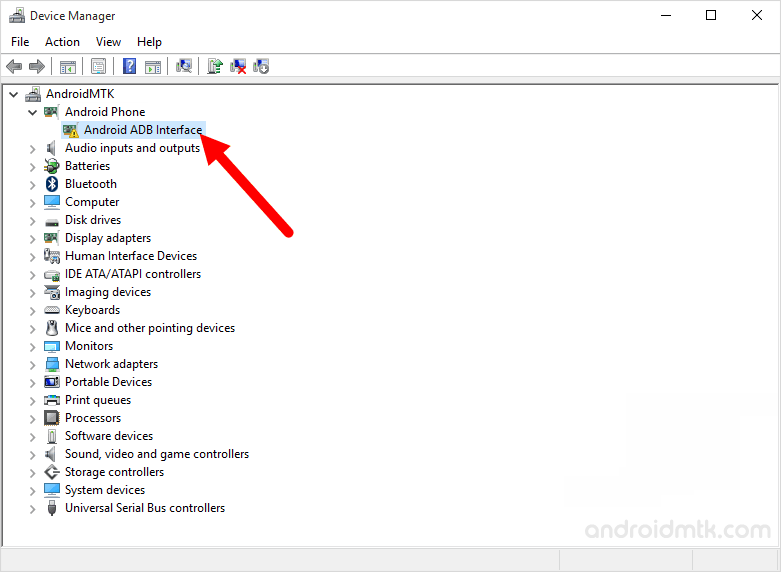
Above, you can see the ADB Driver is installed and listed in the Device Manager. Now, Restart the computer and you will be able to connect almost all the Android devices to the Windows Computer without facing any issue.
Notes
You need to enable USB debugging on your Android Device to connect your device to the Computer. You can Enable USB Debugging on your Android device from the Settings > Developer Optionss.
Google ADB driver is a Universal Driver which supports almost all the Android Device in the market.
Credits: ADB Driver is officially provided by Google Inc. So Full credit goes to the Google Android Team for providing the Driver for free.