These are instructions on how to root Samsung Galaxy Note 3 SM-N900A (AT&T) using Odin on Windows Computer.
Caution: The following method will wipe the data from the device. Therefore, we recommend you to backup your data from the device before following the tutorial below.
Root Samsung Galaxy Note 3 SM-N900A
- Download and Install Samsung USB Driver on the computer. If in case Samsung USB Drivers are already installed on the computer, then SKIP this step.
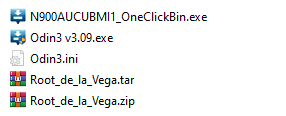
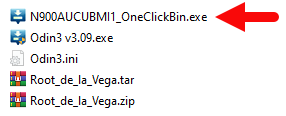
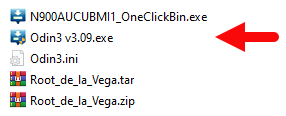
- Download (2.2 GB) and extract the Samsung_Galaxy_Note_3_N900A_Rootfile.7z on your computer. After extracting you will be able to see the following files:
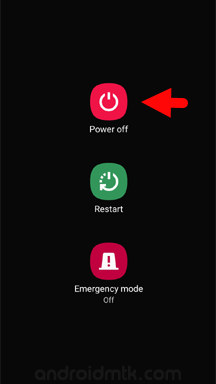
- Switch Off your Smartphone.
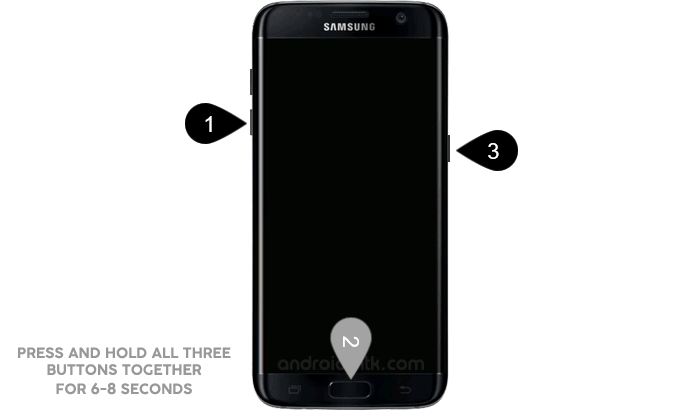
- After switching-off the phone, you need to boot the device into Download Mode. To boot into download mode, Press and hold Volume Down Key, Home Button and Power key at same time for 5-8 seconds until download mode is active.
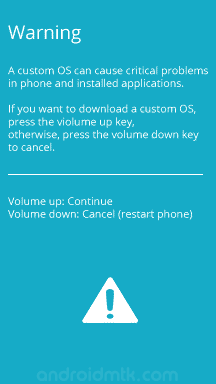
- Once the Download mode is active, you will see a Warning Yellow Triangle Sign. In this situation, you have to press the Volume UP key to enter Odin Download mode.
- Now, Open N900AUCUBMI1_OneClickBin.exe (You have extracted this in Step#2) on your computer. Then connect your phone to the computer.
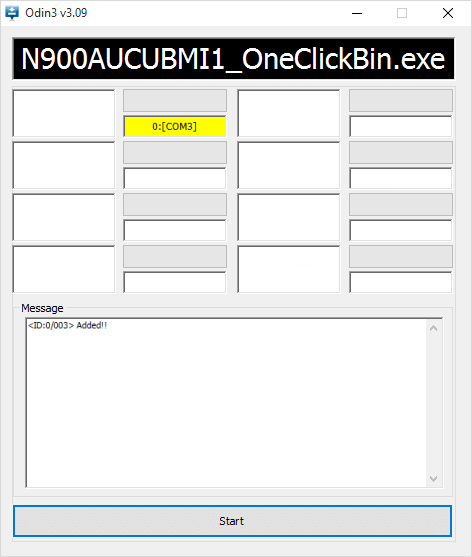
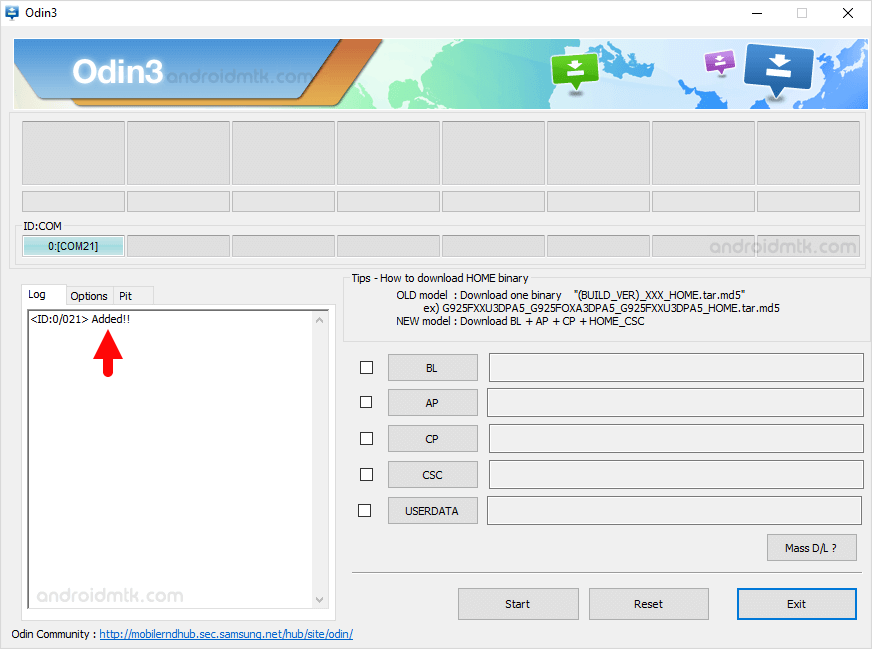
- Once the device is connected to the computer, Odin will automatically recognize the device and displays Added message at the message box.
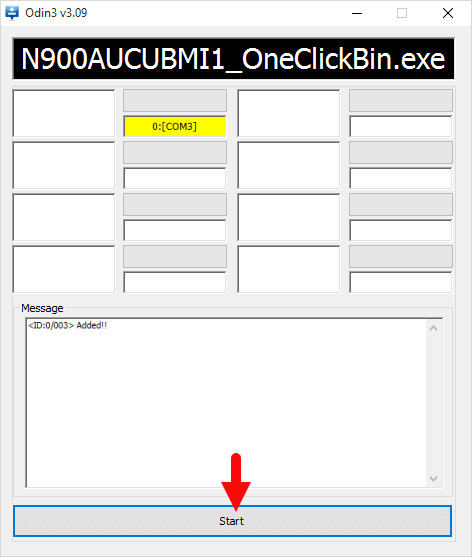
- Click on the Start button in Odin to begin the Flashing process.
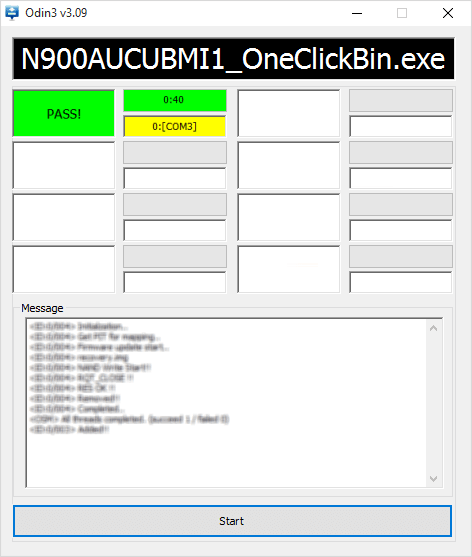
- Once the flashing process is completed, your smartphone will restart automatically and you will be able to see Green Pass message in Odin. Then Disconnect the phone from the computer.
- Now, again Power off your Phone.
- Now, again you have to enter into the download mode. To enter download Mode Press and Hold Volume Down Key, Home Button and Power Button for 5-8 seconds until you boot into recover mode.
- Once the Download mode is active, you will see a Warning Yellow Triangle Sign. In this situation, you have to press the Volume UP key to enter Odin Download mode.
- Now, run Odin3.exe (You have extracted this in Step#2) on your computer. Then connect your phone to the computer.
- Once you have connected the phone to the computer, Odin will automatically recognize the device and show Added message at the lower-left panel.
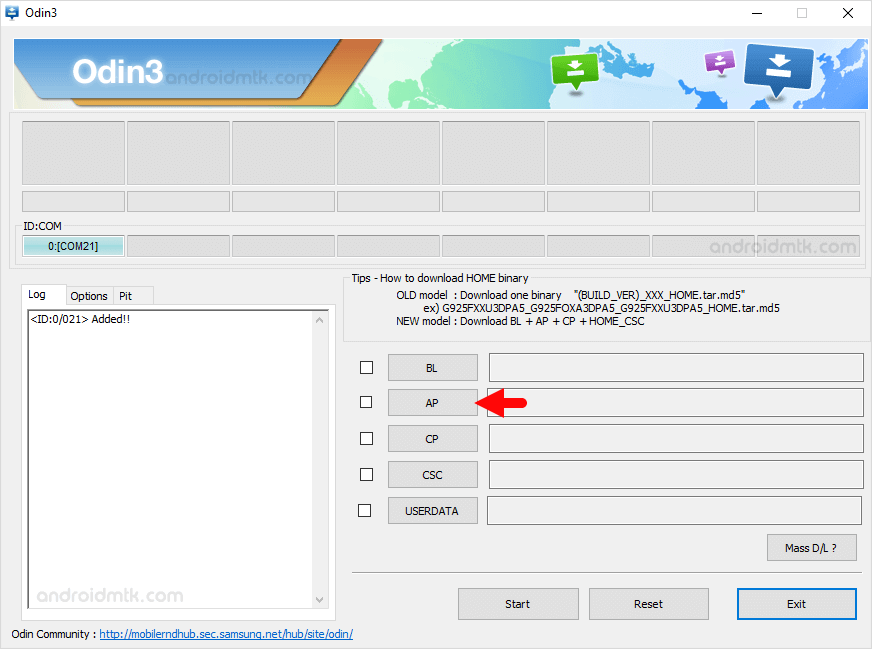
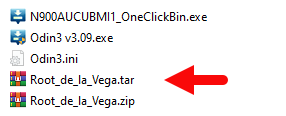
- Once the device is detected by Odin, click on the PDA or AP button and select the Root_de_la_Vega.tar file that you have extracted in Step#2.
- Click on the Start button in Odin to begin the Flashing process.
- Once flashing process is completed your smartphone will restart automatically and you will be able to see Green Pass message in Odin. Then disconnect your Smartphone from the computer.
- Extract Root_de_la_Vega.zip file on the computer. Once the file is extracted, copy the extracted files to the root of the internal sdcard.
- Now, again restart your Smartphone (very important step).
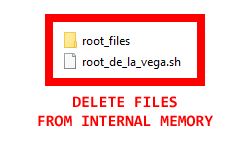
- Once your Phone is restarted, Delete the root files from Phone Memory that you have copied in the Step#18.
- After deleting the files, again restart the device (very important step).
- Now your Samsung Galaxy Note 3 SM-N900A is Rooted. To check whether your phone is rooted correctly, open the Applications Menu, there you will be able to see a new app installed, called SuperSU. If this app exists then, it means you have successfully rooted your device.







Notes
Data loss process Take a backup of your data before following the method above because your data will be deleted post rooting the device.
If you want to root Samsung Galaxy Note 3 N900, then head over to How-to root Note 3 N900 page.
Samsung Stock Firmware: If you are looking for the original firmware for your device, then head over to Download Samsung Stock Firmware page.
Samsung USB Driver: If you are looking for the original USB Driver for your device, then head over to Download Samsung USB Driver page.
Credits: Thanks to designgears (xda developer) for providing the root files for Note 3 N900A. Without the root file, the above tutorial was not possible.