These are instructions on how to update Samsung Galaxy Note 2 N7100 to Android 4.4.2 using Odin on Windows Computer.
Requirements Your Samsung Galaxy Note 2 should have at-least 40 percent or more battery to perform the updating process.
Update Samsung Galaxy Note 2 N7100 to Android 4.4.2
- Download and install Samsung USB Driver on the computer. If in case you have already installed the Samsung Drivers on the computer, then SKIP this step.
- Download and extract it on your computer. After extracting you will be able to see these kind of files:

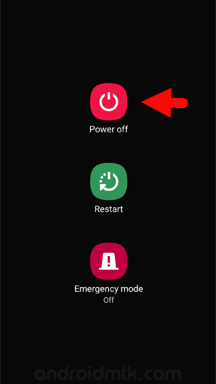
- Power Off your Samsung Device.
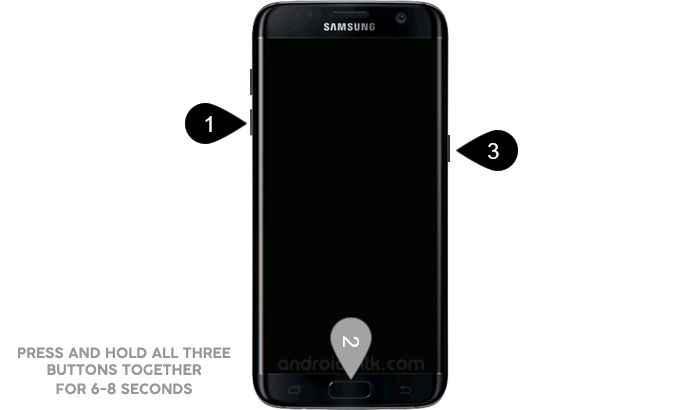
- Now, you have to boot into Download mode. To boot into Download Mode: Press and Hold Volume Down Key, Home Key and Power Key. When phone vibrates Leave the Power Key but Keep holding the Volume Down Key and Home key. You will boot into the Download Mode.
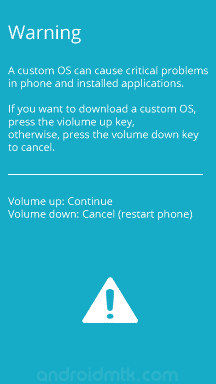
- In the Download mode you will be able to see a Warning Yellow Triangle Sign. In this situation you have to press the Volume up key to continue.
- Download and extract Odin on your computer. After extracting you will be able to see the following files:
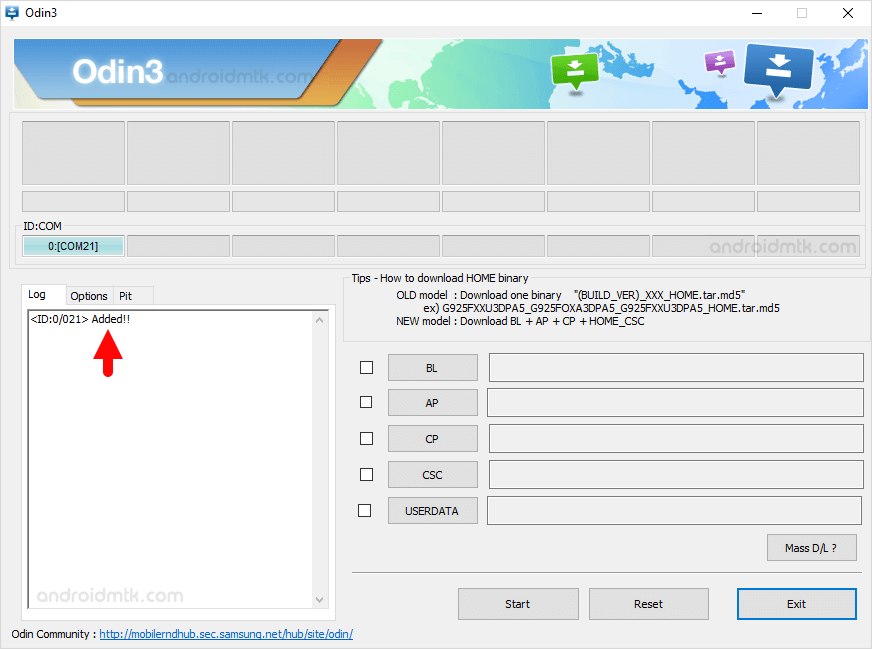
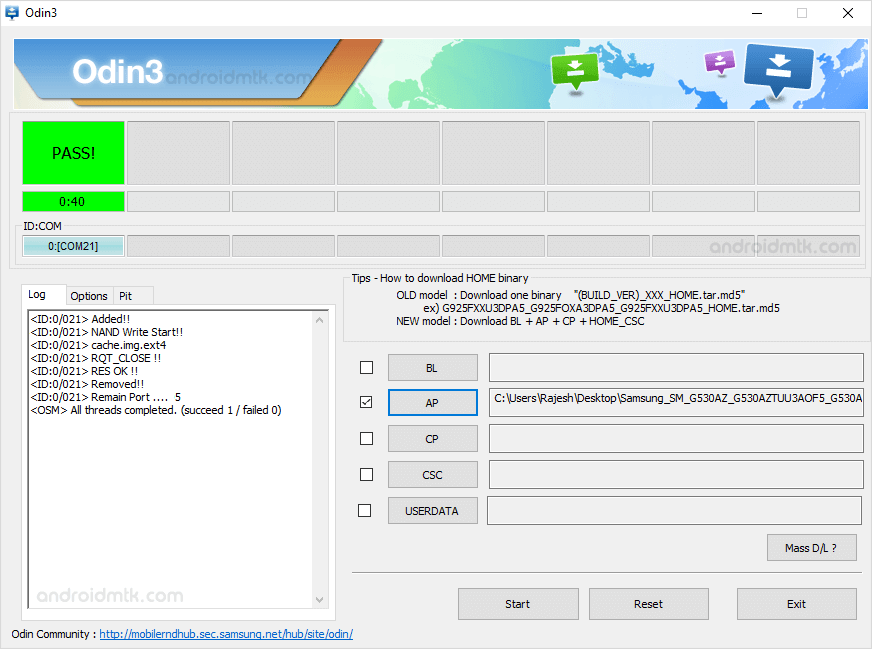
- Now, Open Odin3 and connect your phone to the computer.

- Once you have connected the phone to the computer, Odin will automatically recognize the device and show “Added” message at the lower-left panel.
- Once your device detected by Odin, click on the “PDA” button and select the tar.md5 file that you have extracted in Step #2.


- Now, click on the “Start” button in Odin to begin the Flashing process.

- Once you see, the Green Pass Message then remove the USB cable from the device (during this process, your device will restart automatically).
- Your Samsung Device will now stuck at boot (boot loop). Now, You have to boot into Stock Recovery Mode, To Enable Stock Recovery mode Press and Hold Volume UP key, Home Key, Power Key. When phone vibrates Leave the Power Key but Keep holding the Volume UP Key and Home key. You will boot into the Recovery Mode.

- In Recovery Mode, Wipe Data/factory reset.

- Once Cache Data is cleared, Select Restart Phone Now from the recovery menu.

- Now, your Samsung Device will restart without any issue with the Stock ROM you have flashed.
Notes
Data Loss Process Flashing Stock ROM is always a data loss procedure. So, always take backup of your personal data before flashing the Stock ROM.
If you want to root Samsung Galaxy Note 2 N7100 then see root Note 2 N7100.
Flashing Stock ROM or Downgrading Stock ROM does not void your Phone warranty. So, dont worry Just Flash the Stock ROM.
Samsung Stock Firmware: If you are looking for the original firmware for your device, then head over to Download Samsung Stock Firmware page.
Samsung USB Driver: If you are looking for the original USB Driver for your device, then head over to Download Samsung USB Driver page.