


These are instructions on how to root Google Nexus 7 (2012) WiFi running on android 5.1.1 using Chainfire Root Tool on Windows Computer.
Remember Your Google Nexus 7 should have at-least 30-40 percent of battery to perform the rooting process.
If you are having Google Nexus 7 (2012) Mobile Variant then head over to this Page for correct root guidelines.
Root Google Nexus 7 (2012) WiFi on android 5.1.1
- Download and install Google Nexus 7 USB driver on your computer. If Nexus 7 Tab USB drivers are already installed on your computer then skip this step.

- Enable USB Debugging on your Nexus 7 Tab. To enable the USB debugging Open Settings > Developer Options > USB Debugging > Tap on the Checkbox to Enable it.
(Developer Options are hidden for Android 4.2.2 and above. Go to Settings > About Phone > Built Number > Tap on it 5-8 times to display this option).

- Now, Power off your Nexus 7 Tab.

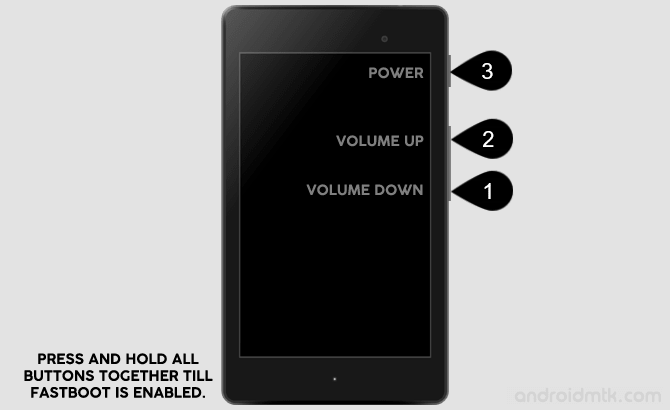
- Now, you have to enable Fastboot Mode on your Nexus 7 Tab while it is power-off. To enable FastBoot Mode Press and Hold Volume Up, Volume Down and Power Button at same time until FastBoot Mode is enabled.

- Connect your Nexus 7 Tab to the computer.

- Download and extract AutoRoot Tool on your Windows Computer. After extracting, you will be able to see the following files:
- From the extracted file, Open root-windows.bat file.

- Once root-windows.bat is opened you will see the following window:
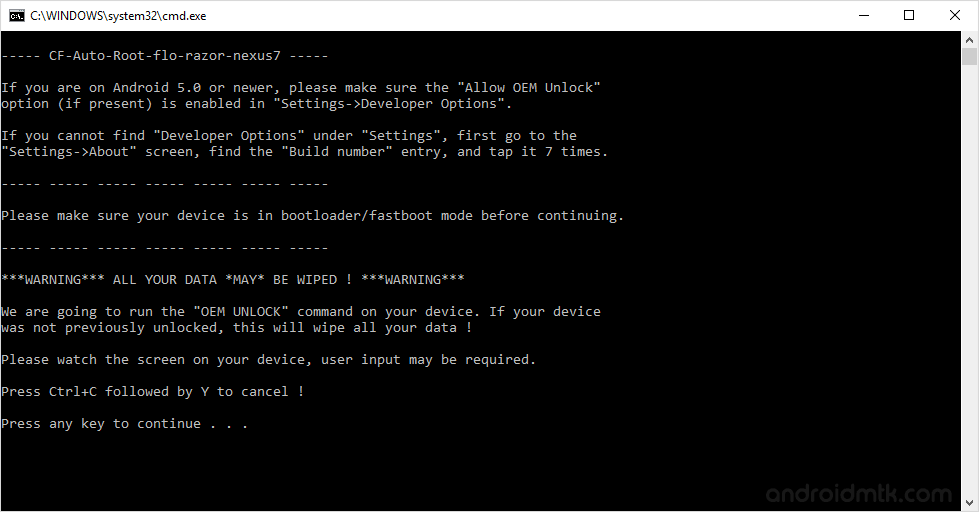
- Press any key from the keyboard of your computer to begin the rooting process.
- Now you will be able to see Unlock Bootloader Screen on your Nexus 7 Tab. Select Yes using volume up/down button and power button to continue.

- Now, on the next screen you will be able to see the FastBoot Screen with Disabled Lock State (at button) which means you have successfully unlocked the bootloader of Nexus 7 Tab.

- Now, your Nexus 7 tab will automatically show red android logo and rooting process will continue. Once Rooting process is completed your Nexus 7 tab will restart automatically.
- Your Nexus 7 Tab will take 2-3 minutes to restart. Once your Tab is restarted successfully, you will be able to see the welcome screen.
- Now your Nexus 7 is rooted successfully. To confirm, Open App Drawer (menu) and you will be able to see a new Application installed called SuperSU. If you find this app then it means your device is rooted.

Optional You an also verify the Root Status of your Google Nexus 7 Tab using Root Checker Application.

Notes
No data loss process: Your Data like contacts, pictures, videos, music and etc will be not affected with the above method.
Warranty Void Your Google Nexus 7 Tab Warranty will be void after following the above tutorial.
Google Nexus Pixel Stock Firmware: If you are looking for the original firmware for your device, then head over to Download Google Nexus Pixel Stock Firmware page.
Google Nexus Pixel USB Driver: If you are looking for the original USB Driver for your device, then head over to Download Google Nexus Pixel USB Driver page.
Credits: The Google Nexus 7 Auto Root Tool was created by Chainfire, so full credits goes to him for the root tool.

